Infinity Mirror HYPERCRYSTAL
This object is the result of a series of algorithmic/generative art techniques I’ve been working on, on and off, for the last decade. I was really excited to see my latest build get a lot of attention on twitter. I’ve written up a build log with details on how I generated and constructed this object:
WHAT
Laser cut generative art. A non-platonic non-symmetrical solid with eight faces, each cut from 30% transparent plastic with each pair of connected faces held together by a plywood joinery system I developed.
WHAT?
I used a generative algorithm of my own making to generate this geometry: plywood connective pieces, mirrored crystal faces, cardboard tray.
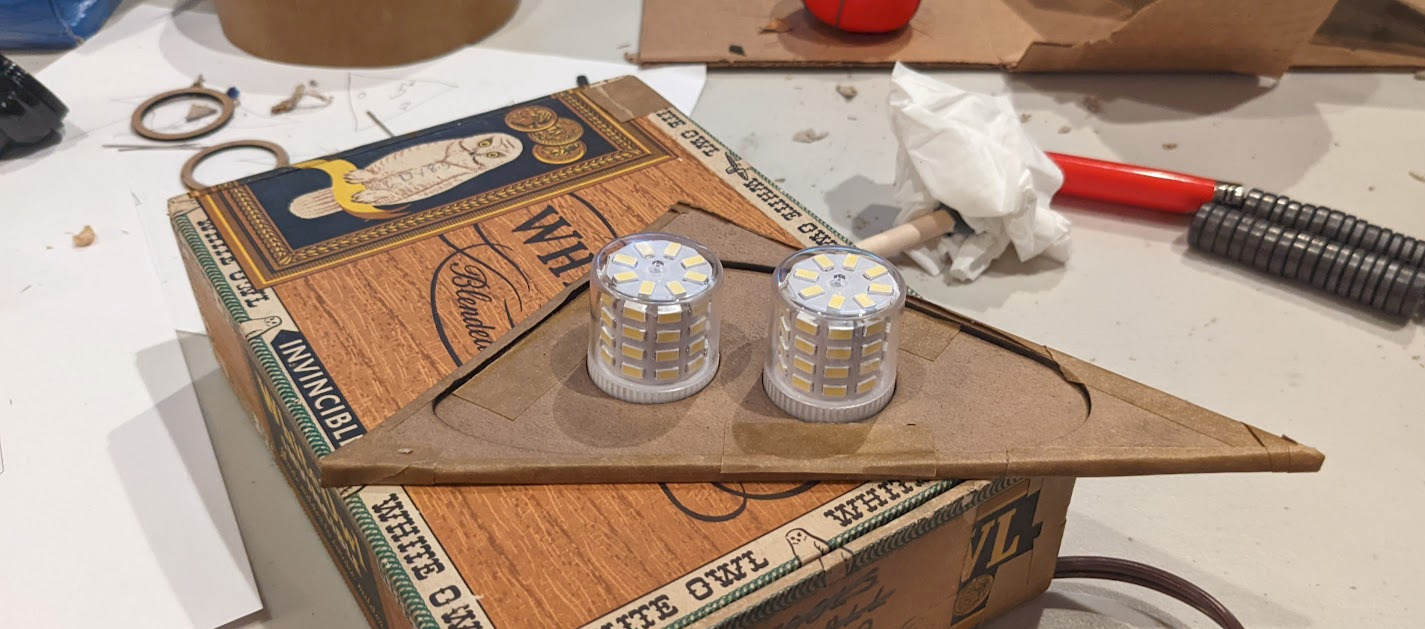
I combined these pieces with a cardboard cigar box gifted to me by my sister (an amazing artist, check out her portfolio). This box holds the electronics and the base of the LED lightbulbs that illuminate the piece, which allows me to maintain the illusion of a crystal sitting on top of a box, with each perceived as a standalone object.

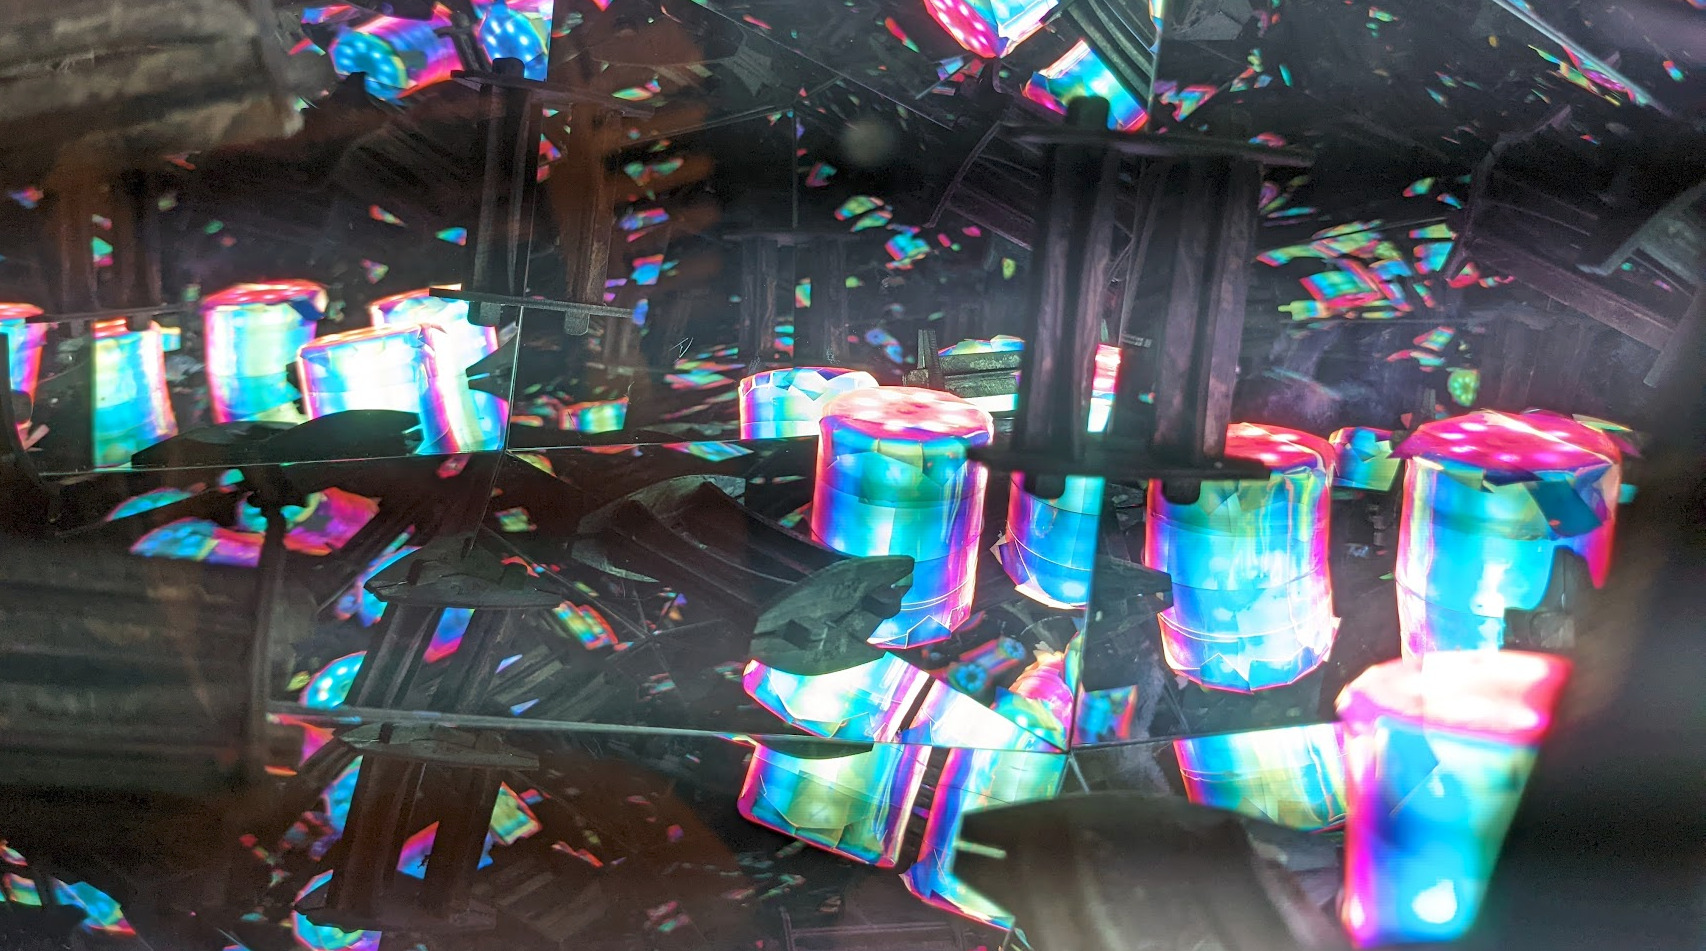
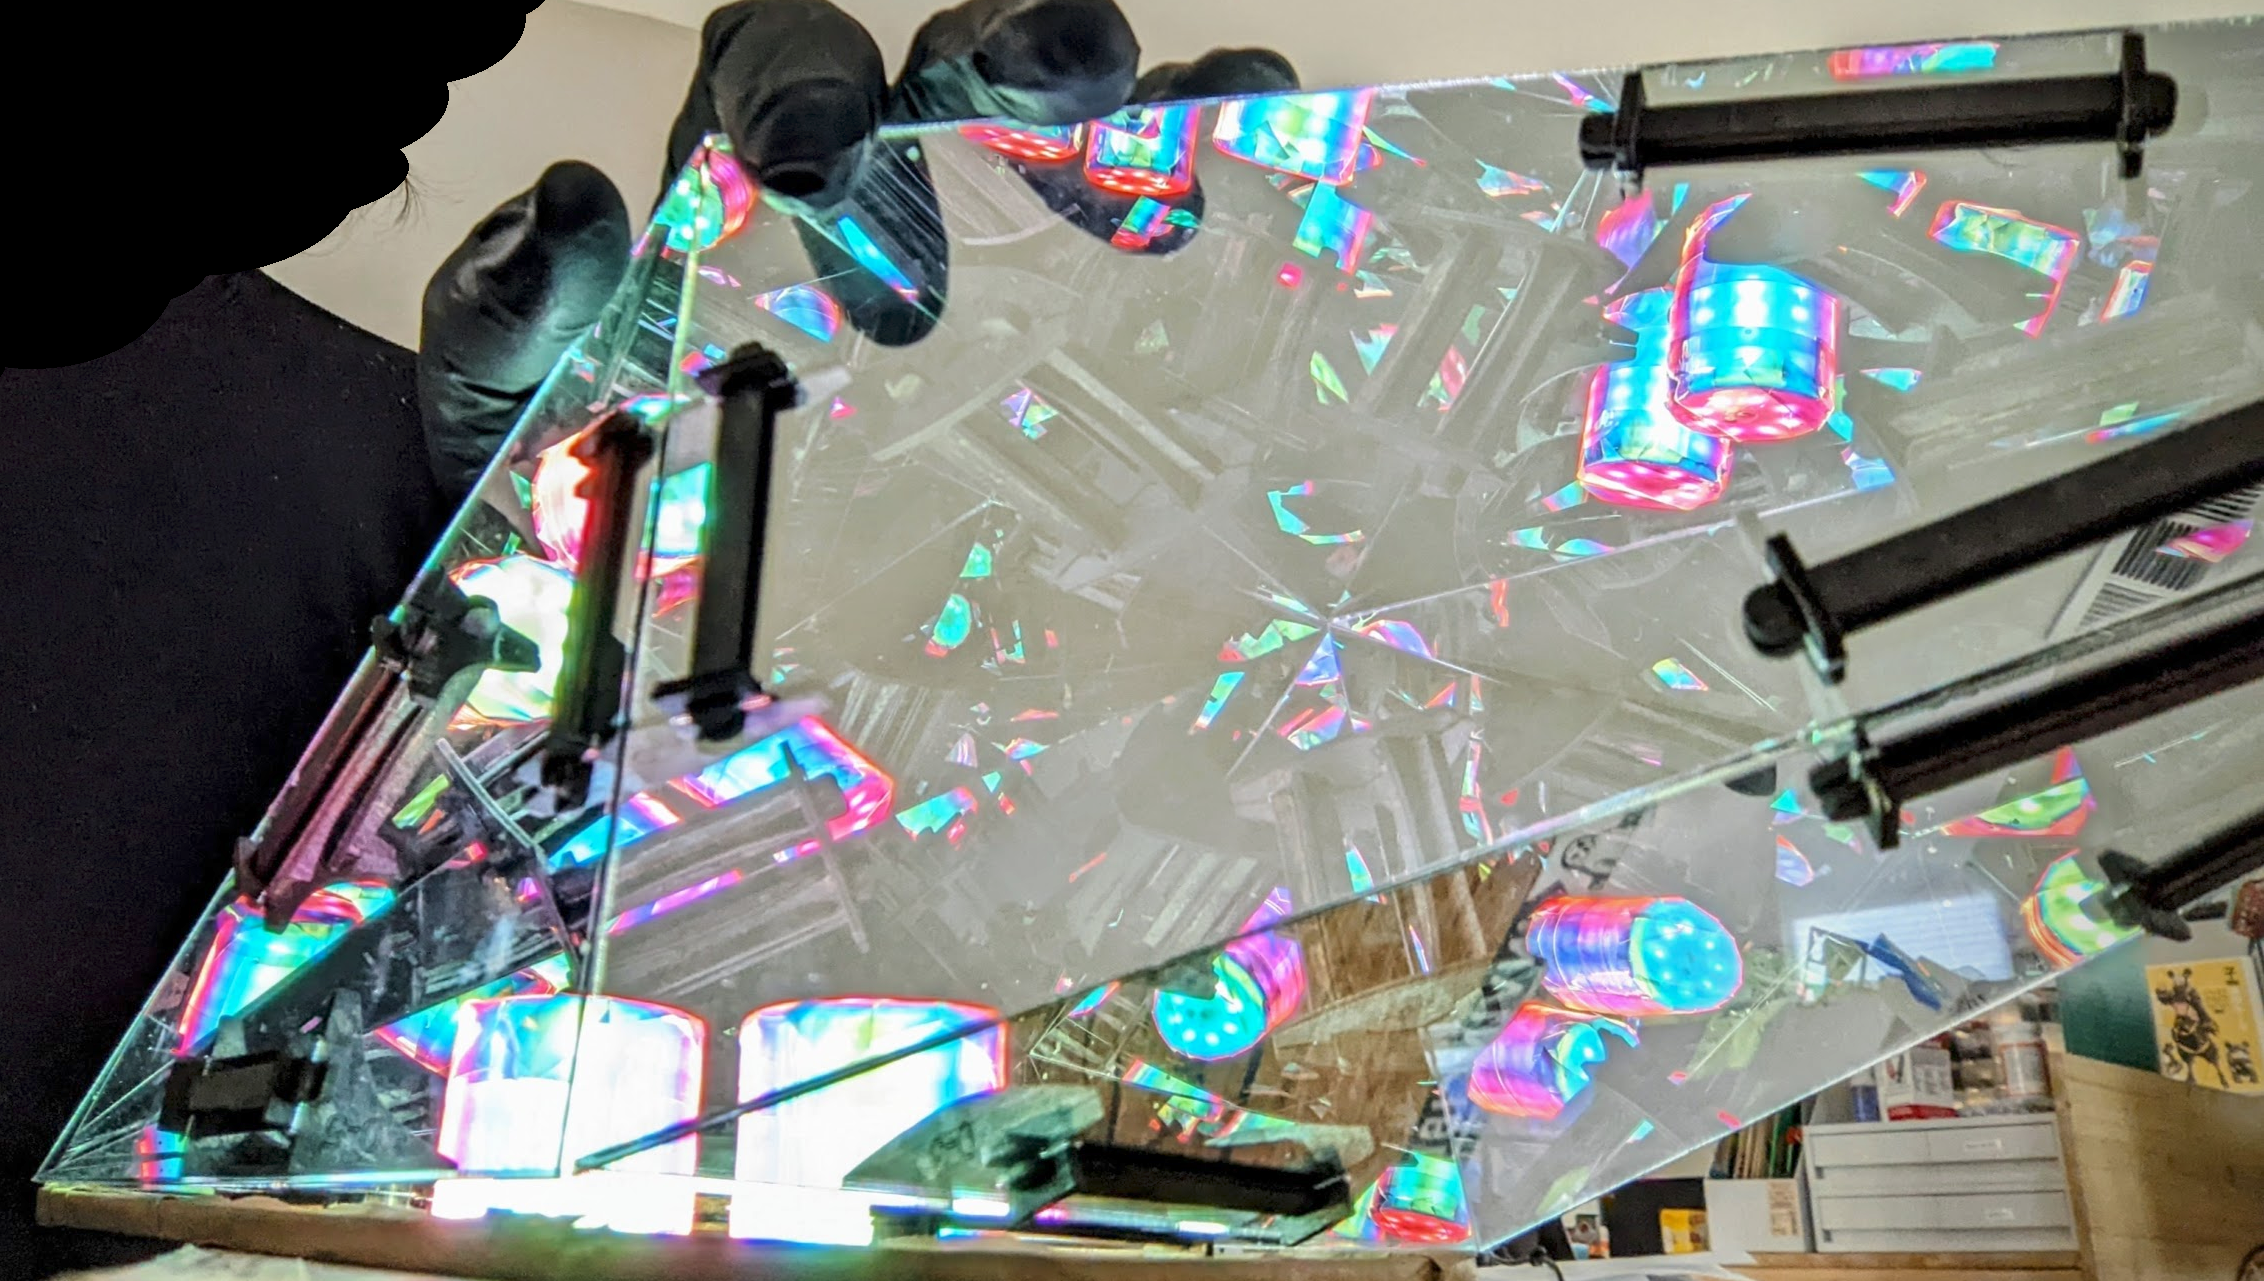
The infinity effect was achieved, but it was insufficiently eldritch. The white LED bulbs are too obviously modern technological artifacts. I needed to obscure their form somehow.
I used partially transparent dichroic tape to obtain a lovely glitch rainbow effect. The color of dichroic materials shifts based on the angle of view, which means that they look really cool when light is filtered through them.
HOW
3D Model
I start by creating a very low poly 3D model. In this case, a crystal:
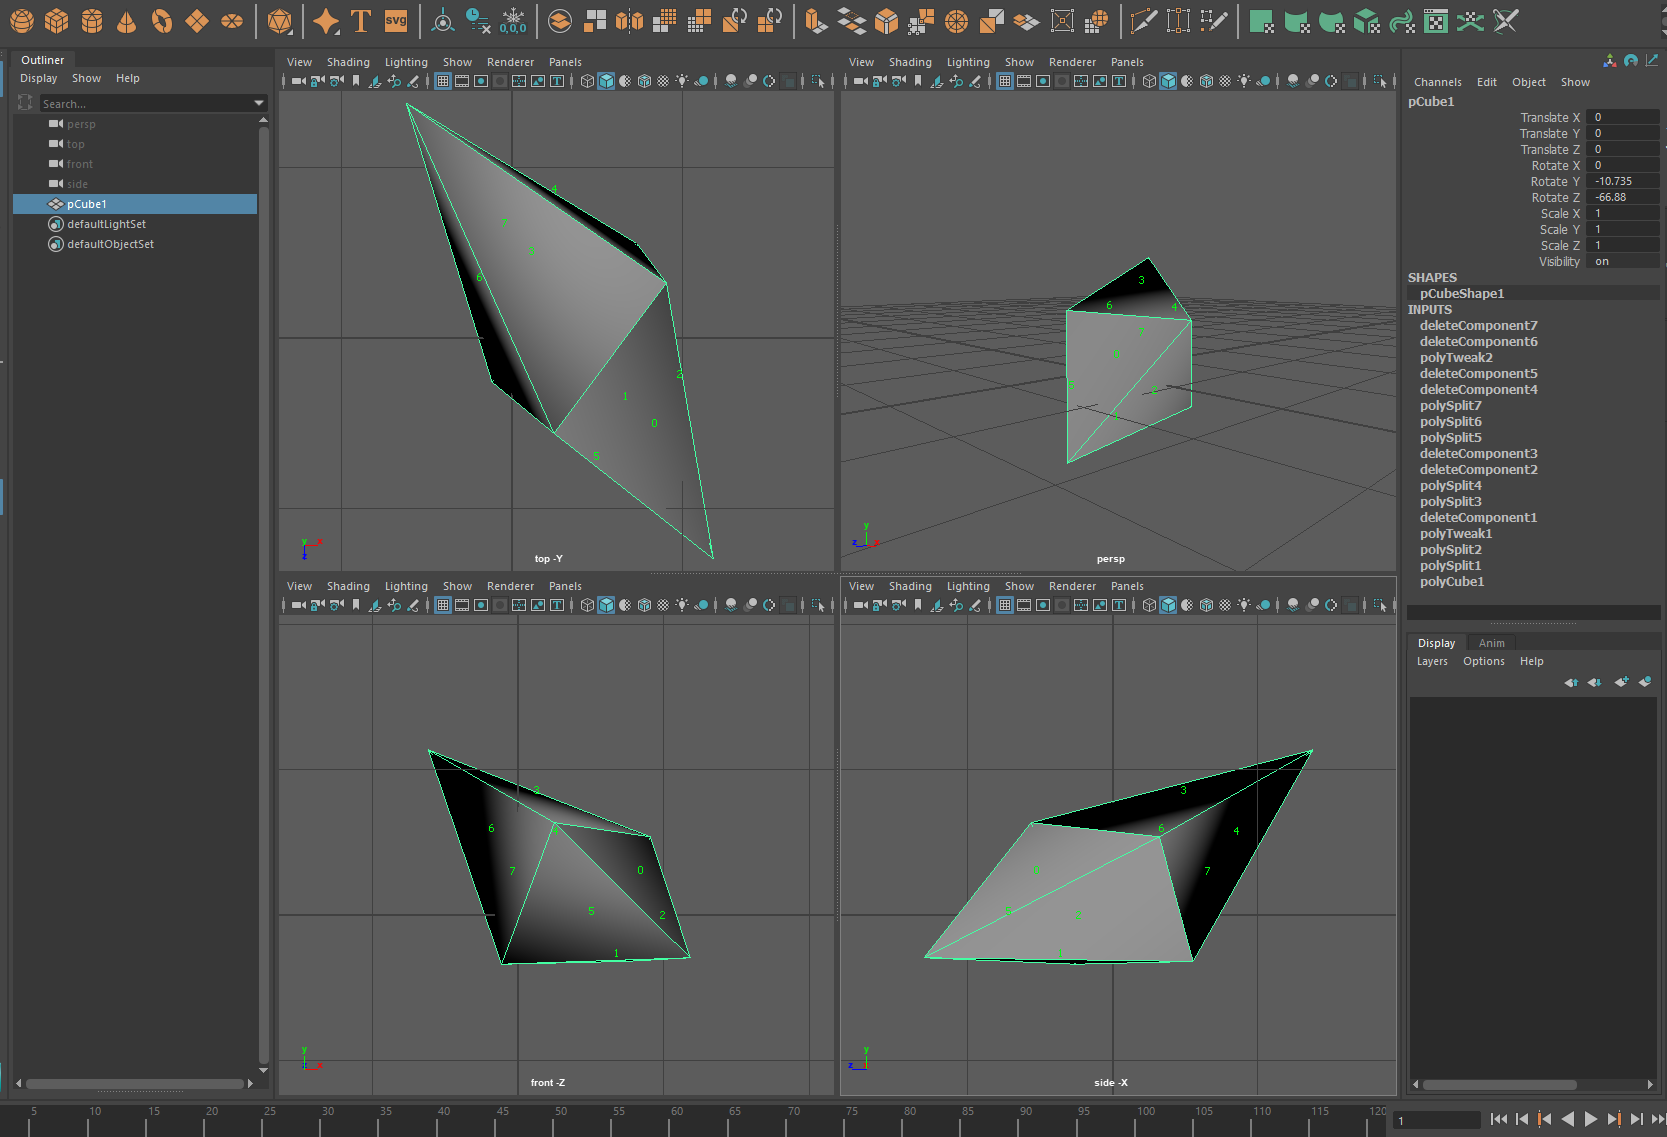
Then, I use a tool I’ve built using rustlang to generate a series of 2D vector drawings of the various physical components that make up the object. These 2D drawings are cut out of sheets of plywood and acrylic using a laser cutter.
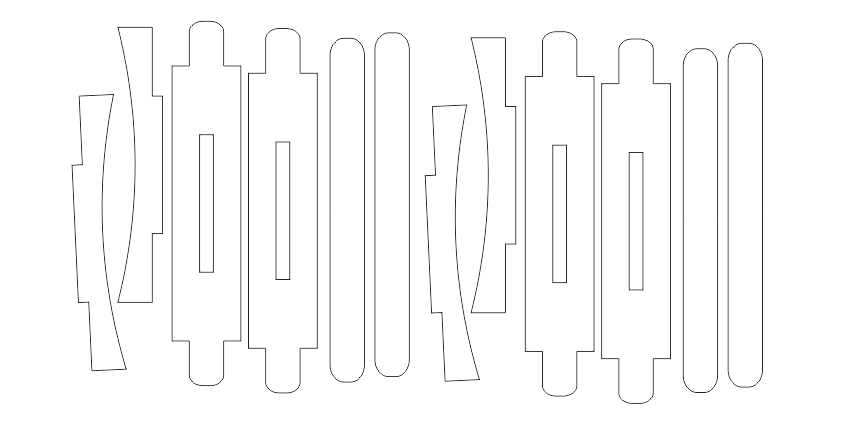
2D Geometry
Faces
Let’s start with the faces, each of which corresponds exactly to one of the faces in the original 3D model:
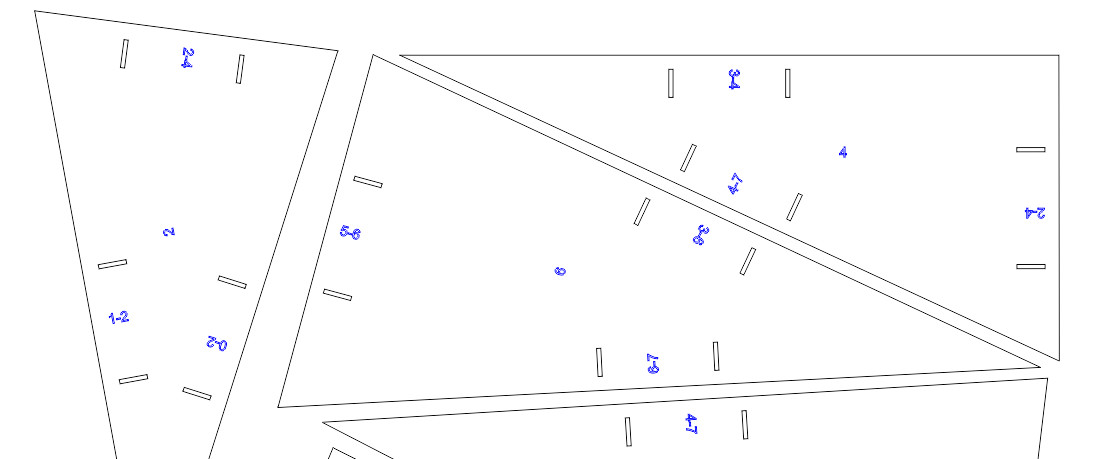
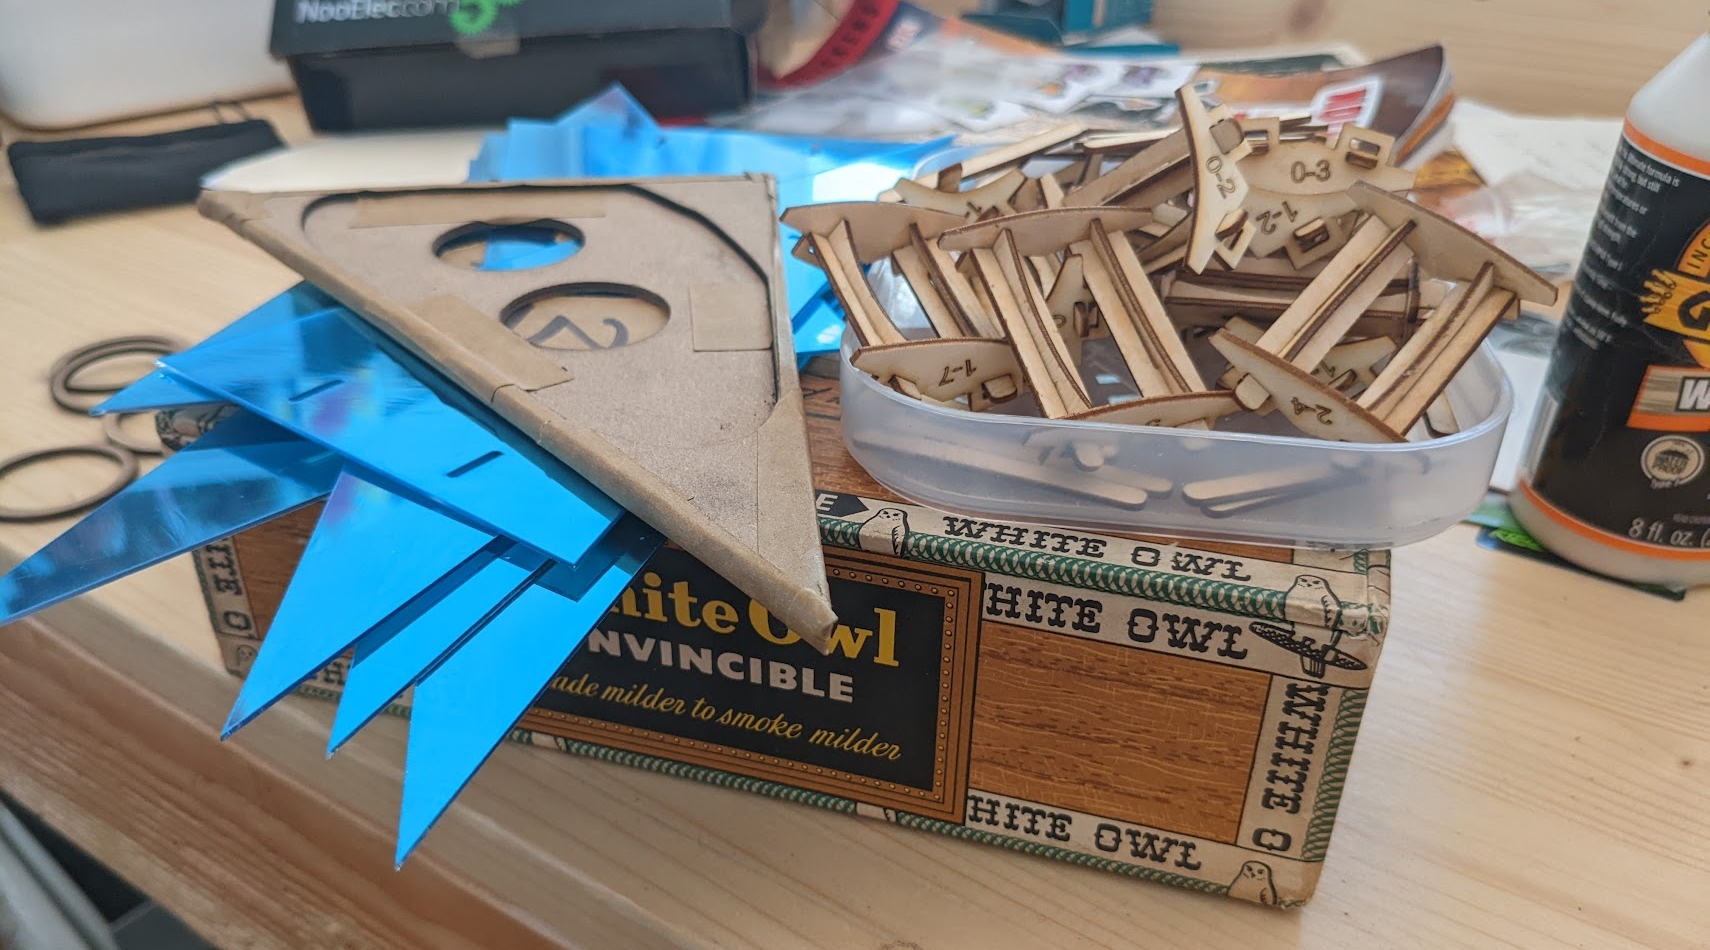
here’s what the resulting laser cut pieces look like:
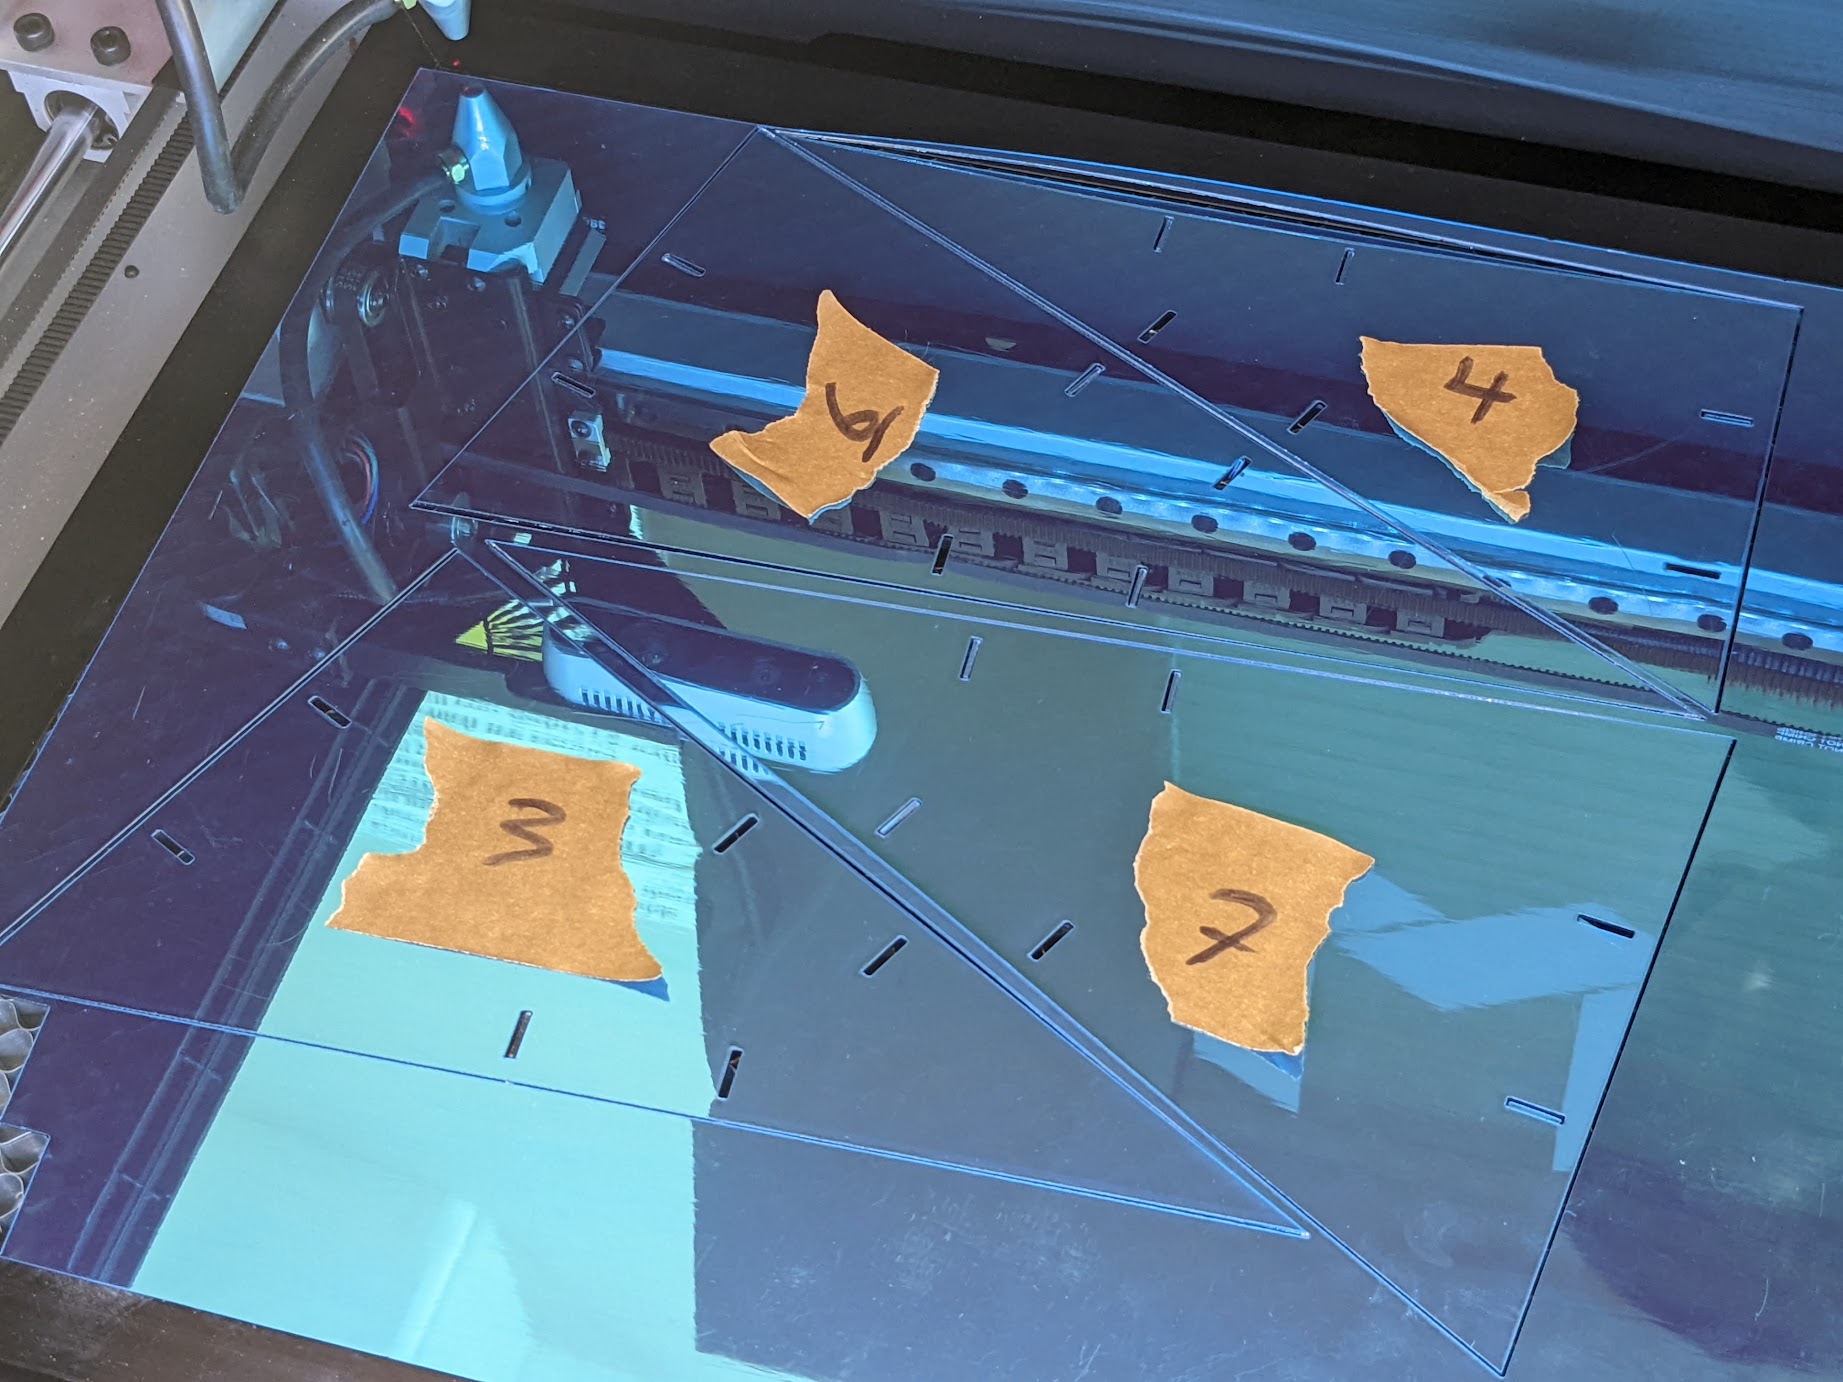
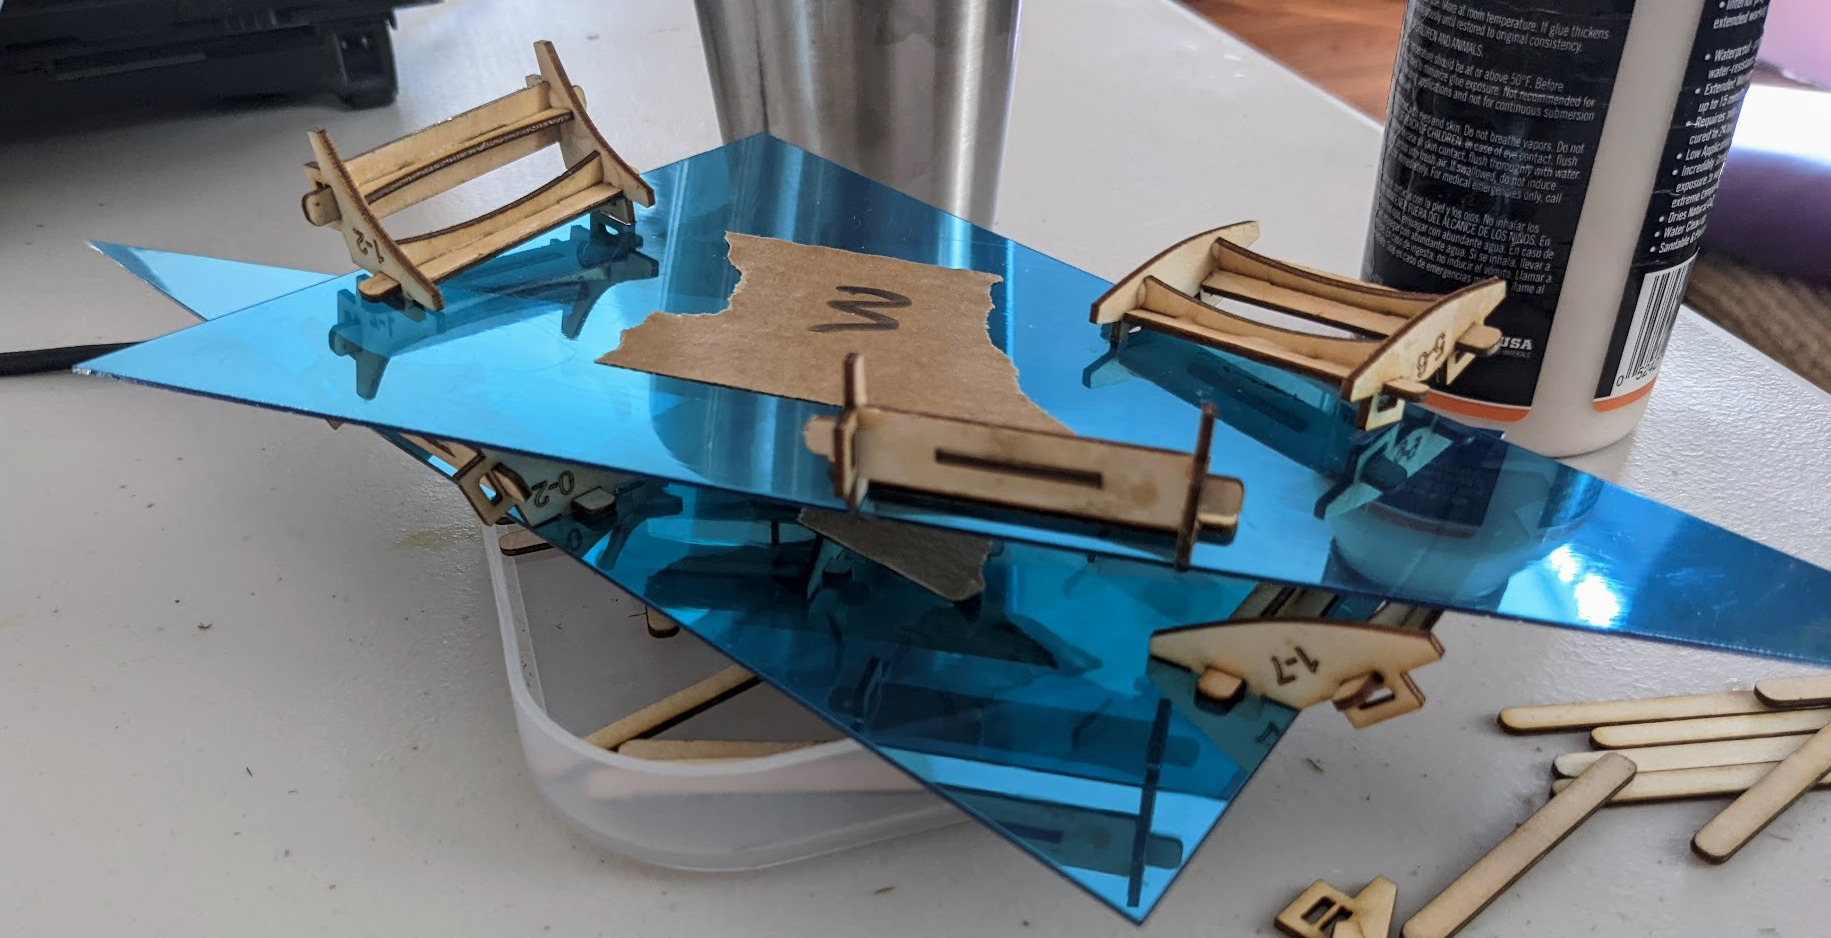
The blue film protects the mirrored surface of the acrylic.
Edges
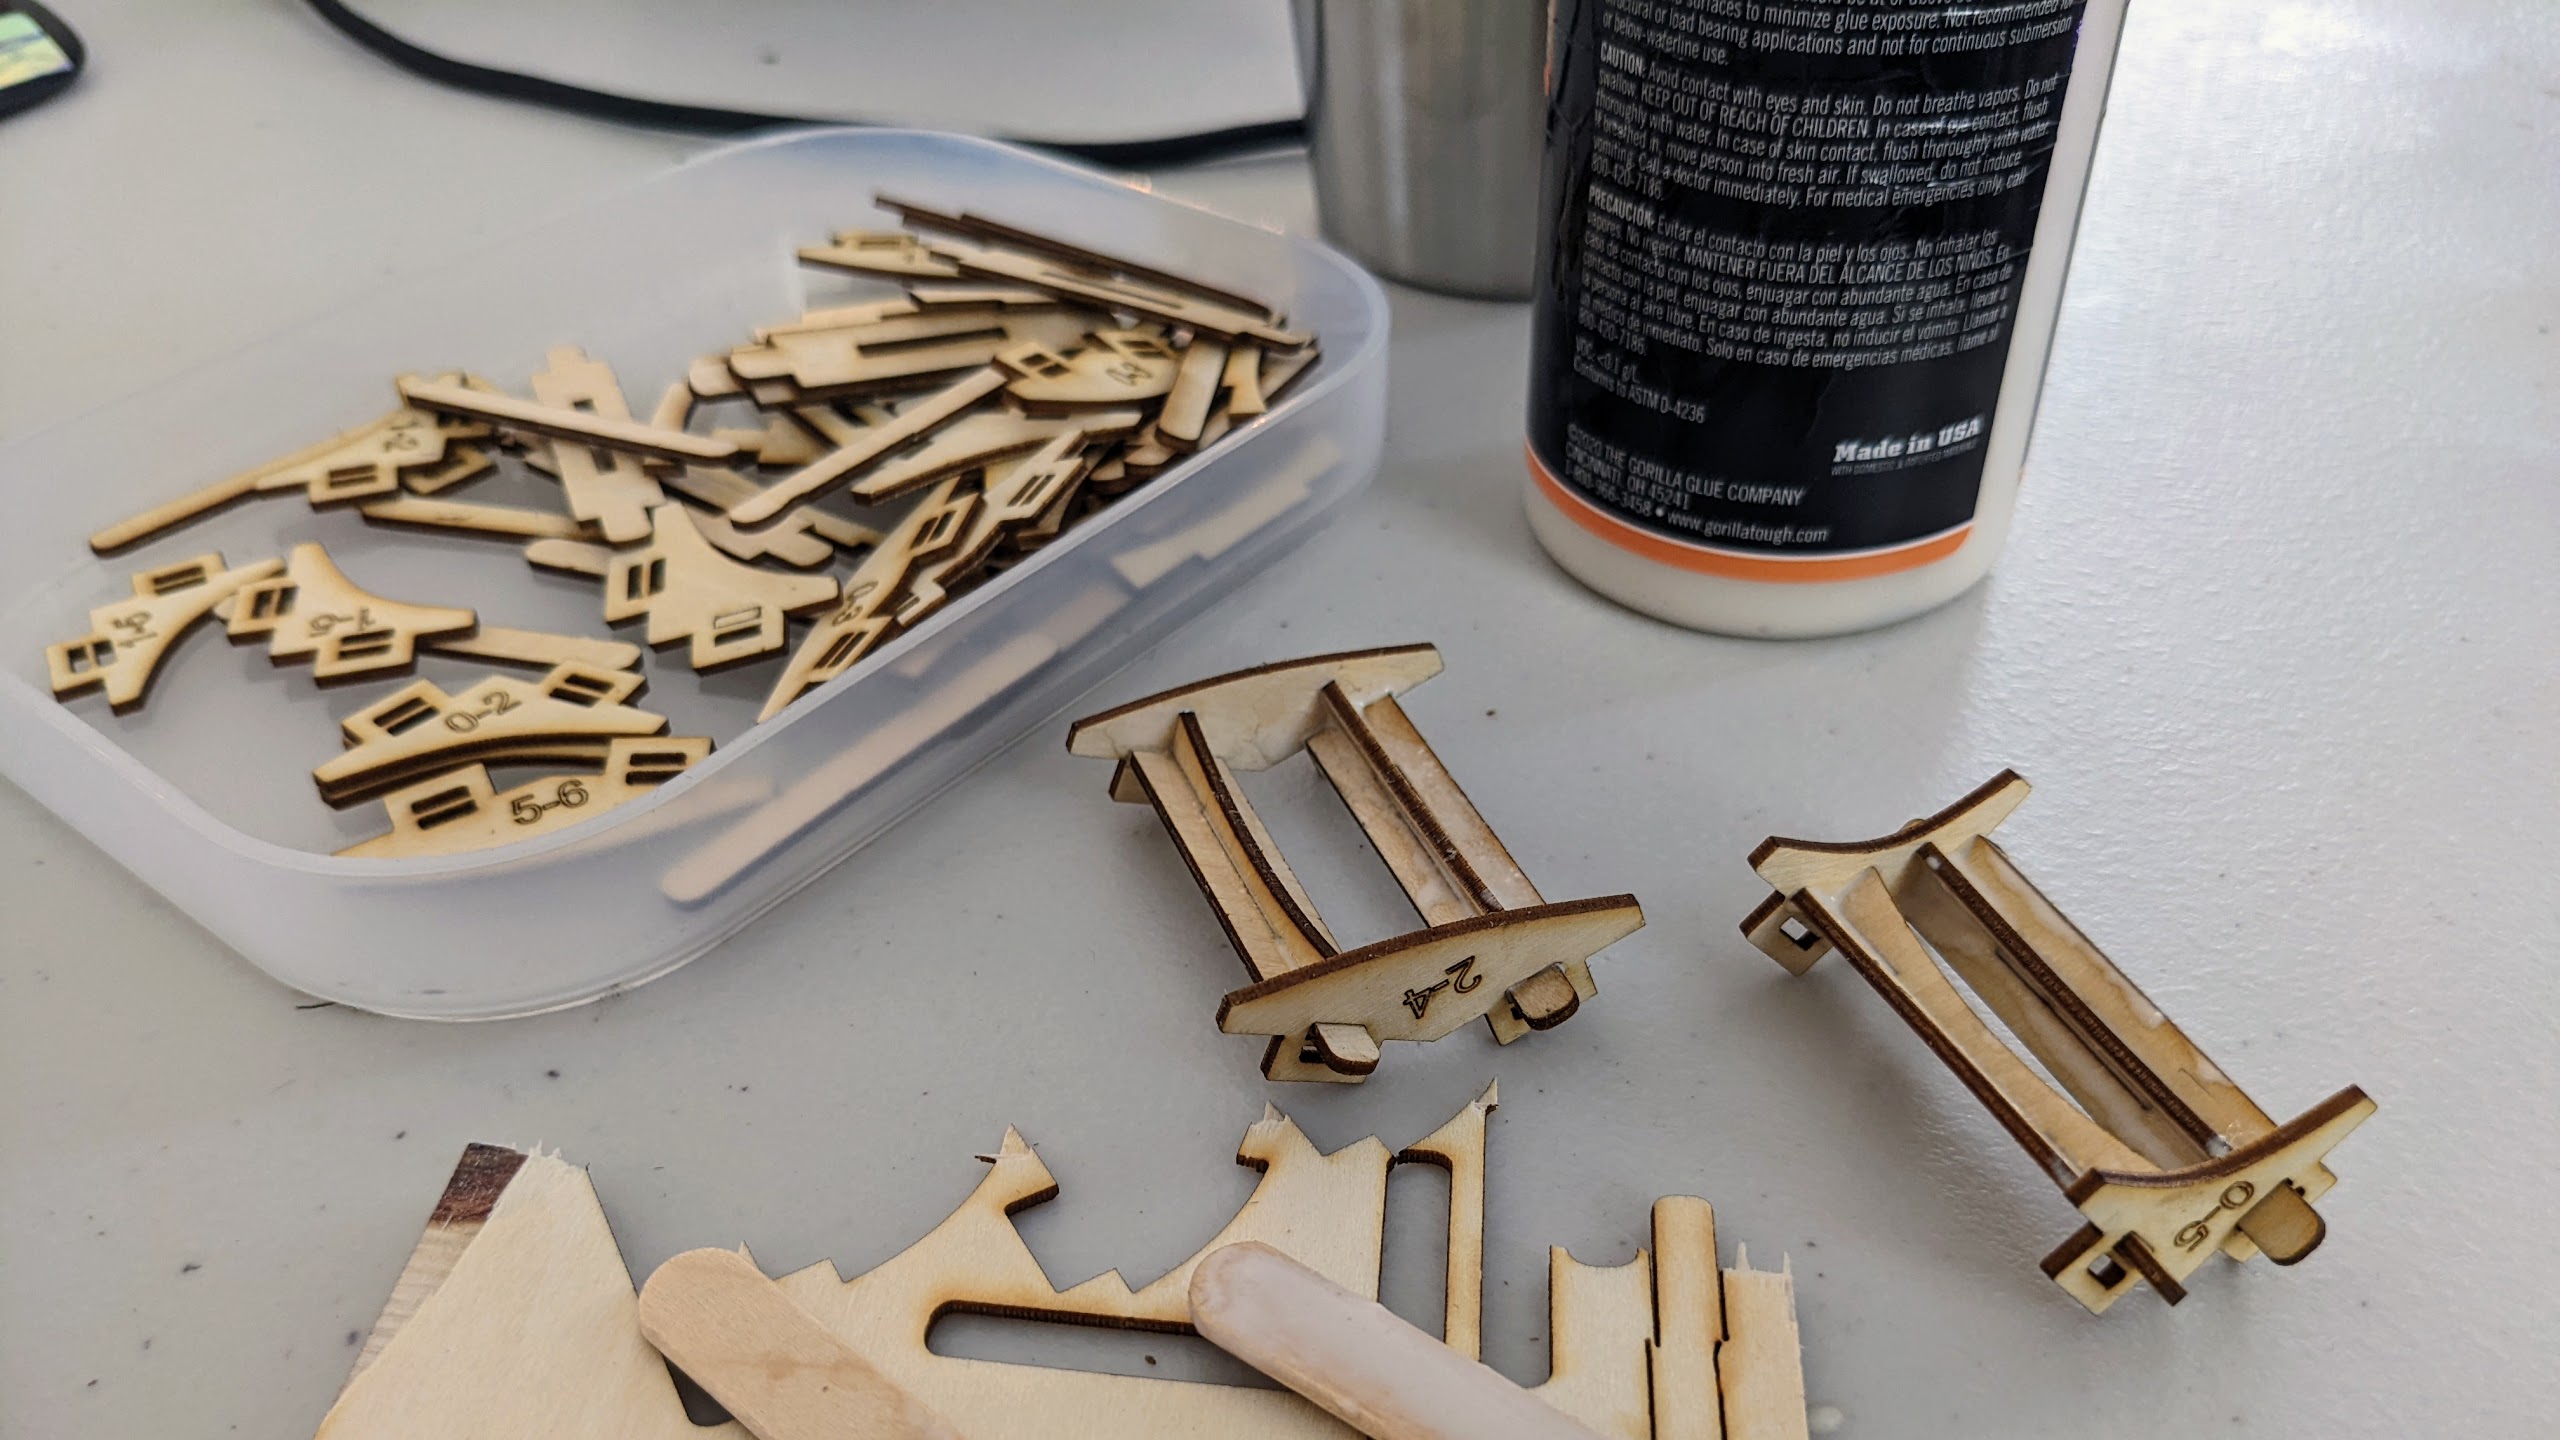
The algorithm also generates a series of edge connector pieces, each corresponding to the exact angle betwen the pair of faces that share an edge:
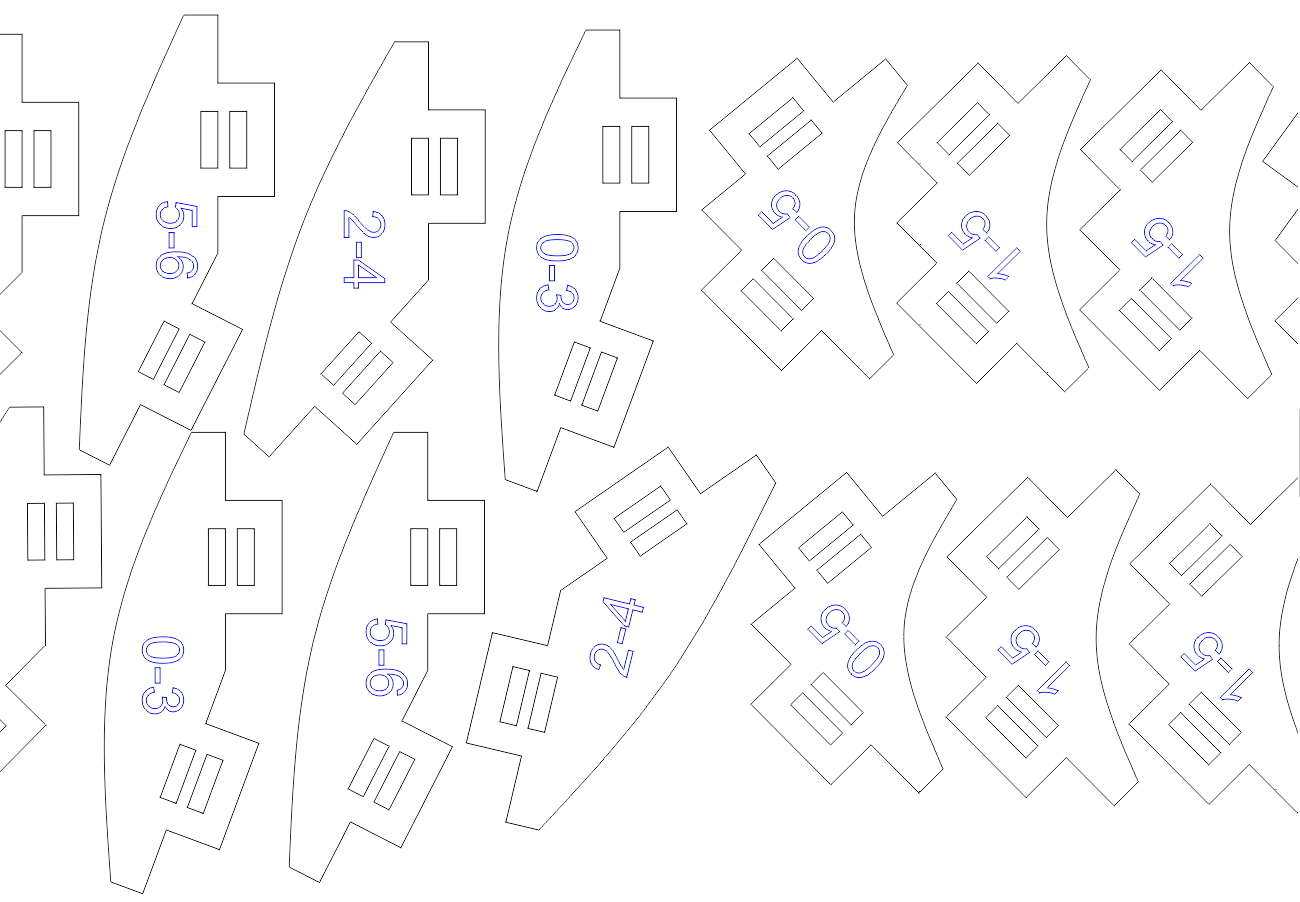
These pieces are combined with a series of struts to form the connective tissue of the piece:
Here’s what these pieces look like after laser cutting, and before assembly:

3D Assembly
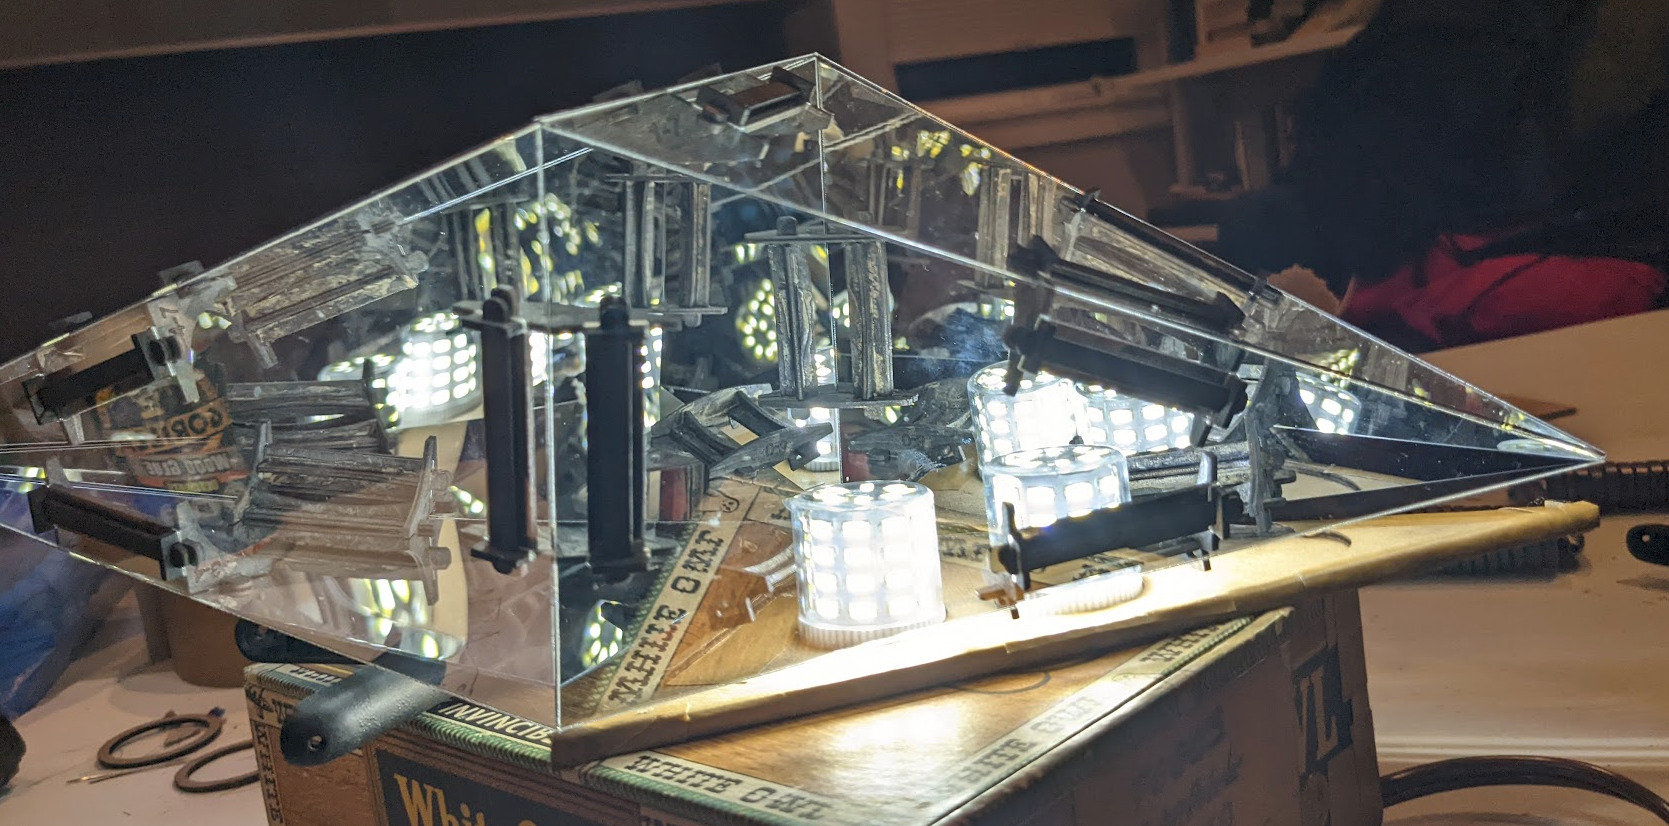
First, I assembled the edge components using wood glue to hold them together. The resulting structure is surprisingly resilient due to the way it’s put together.
I used dark wood stain to give them an aged, charred effect.

Then I did a quick test fitting, with the blue protective film still present:
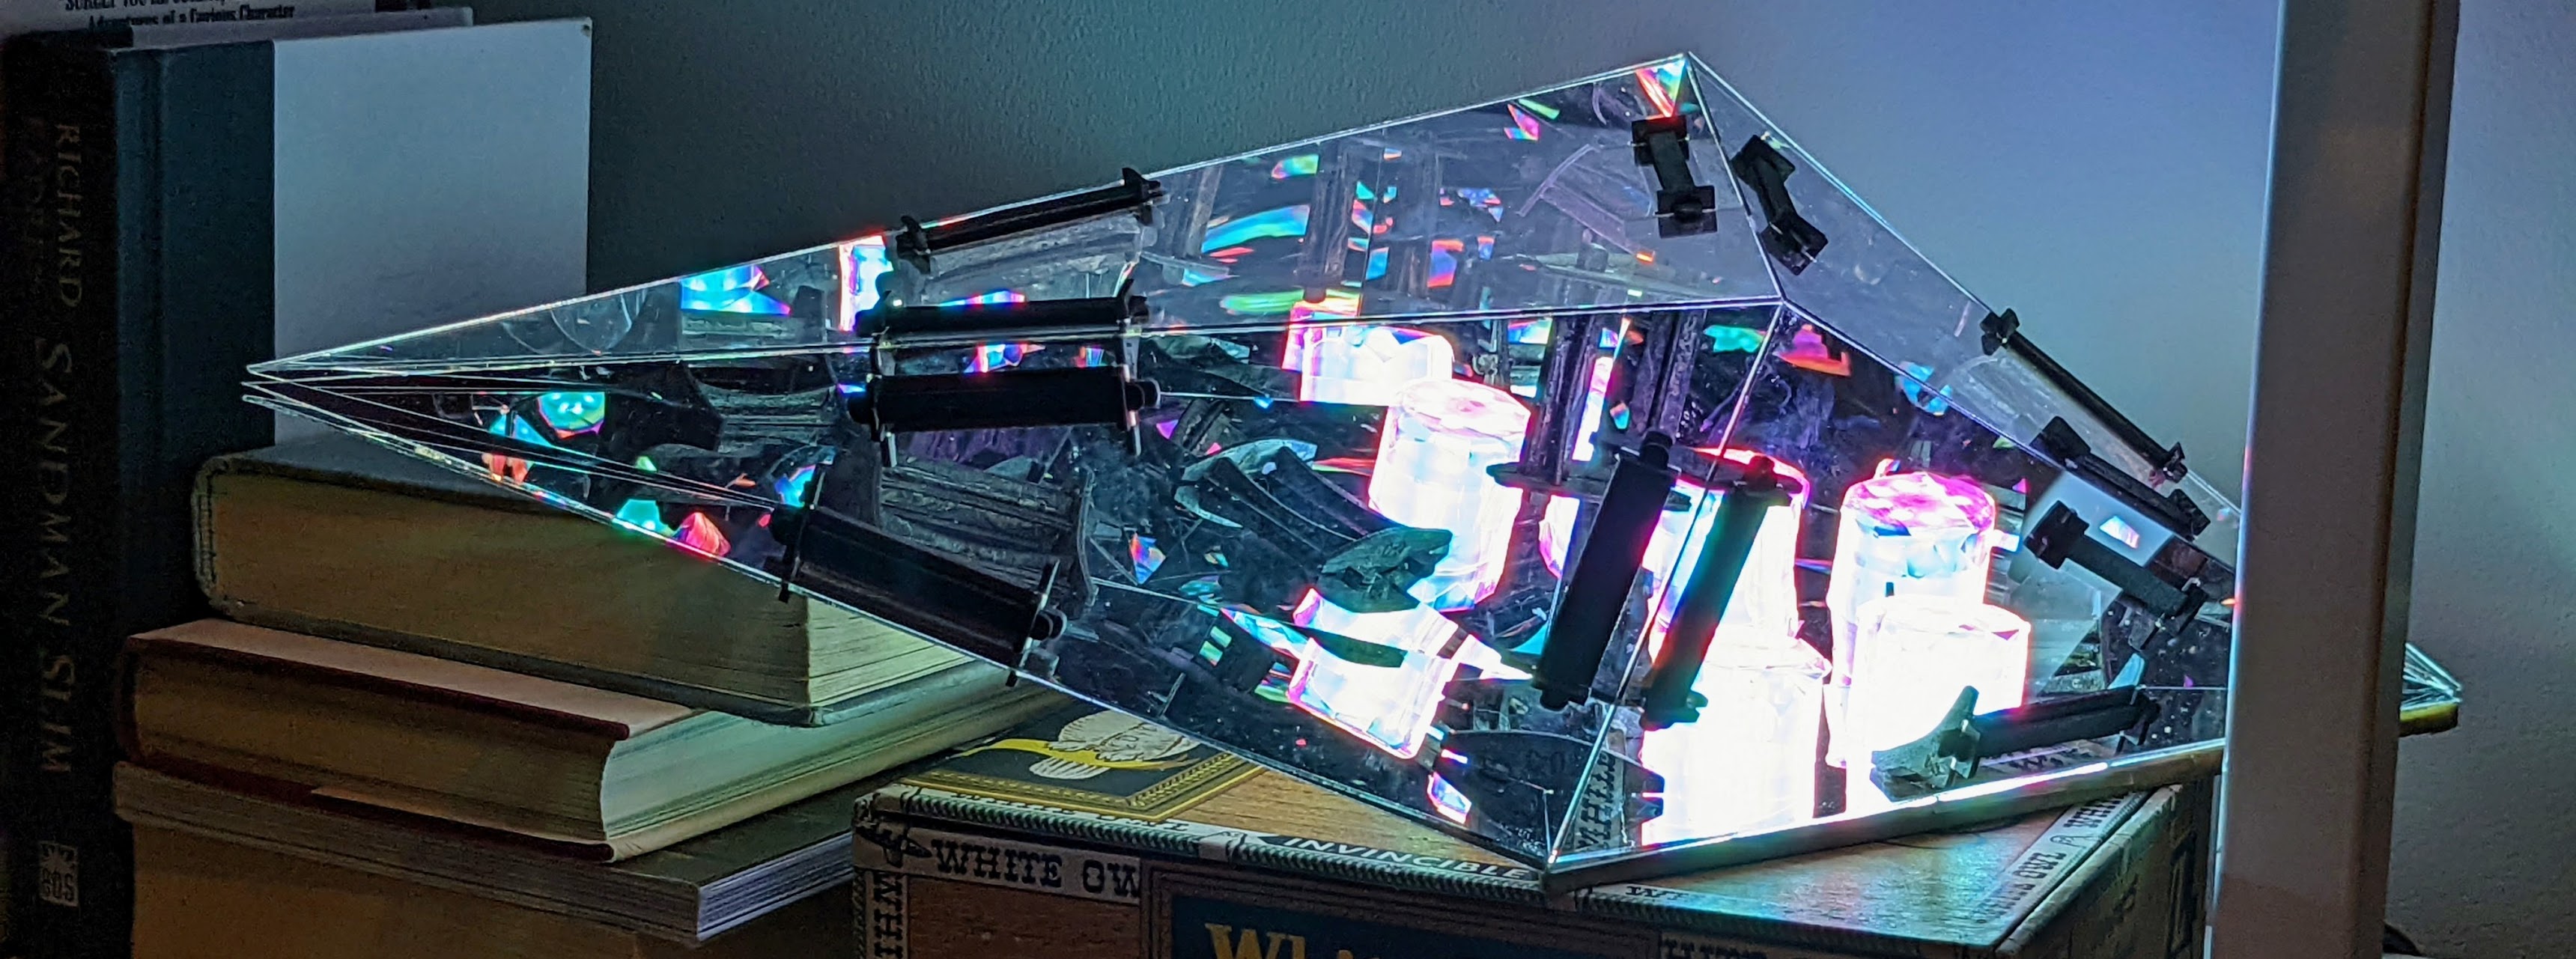
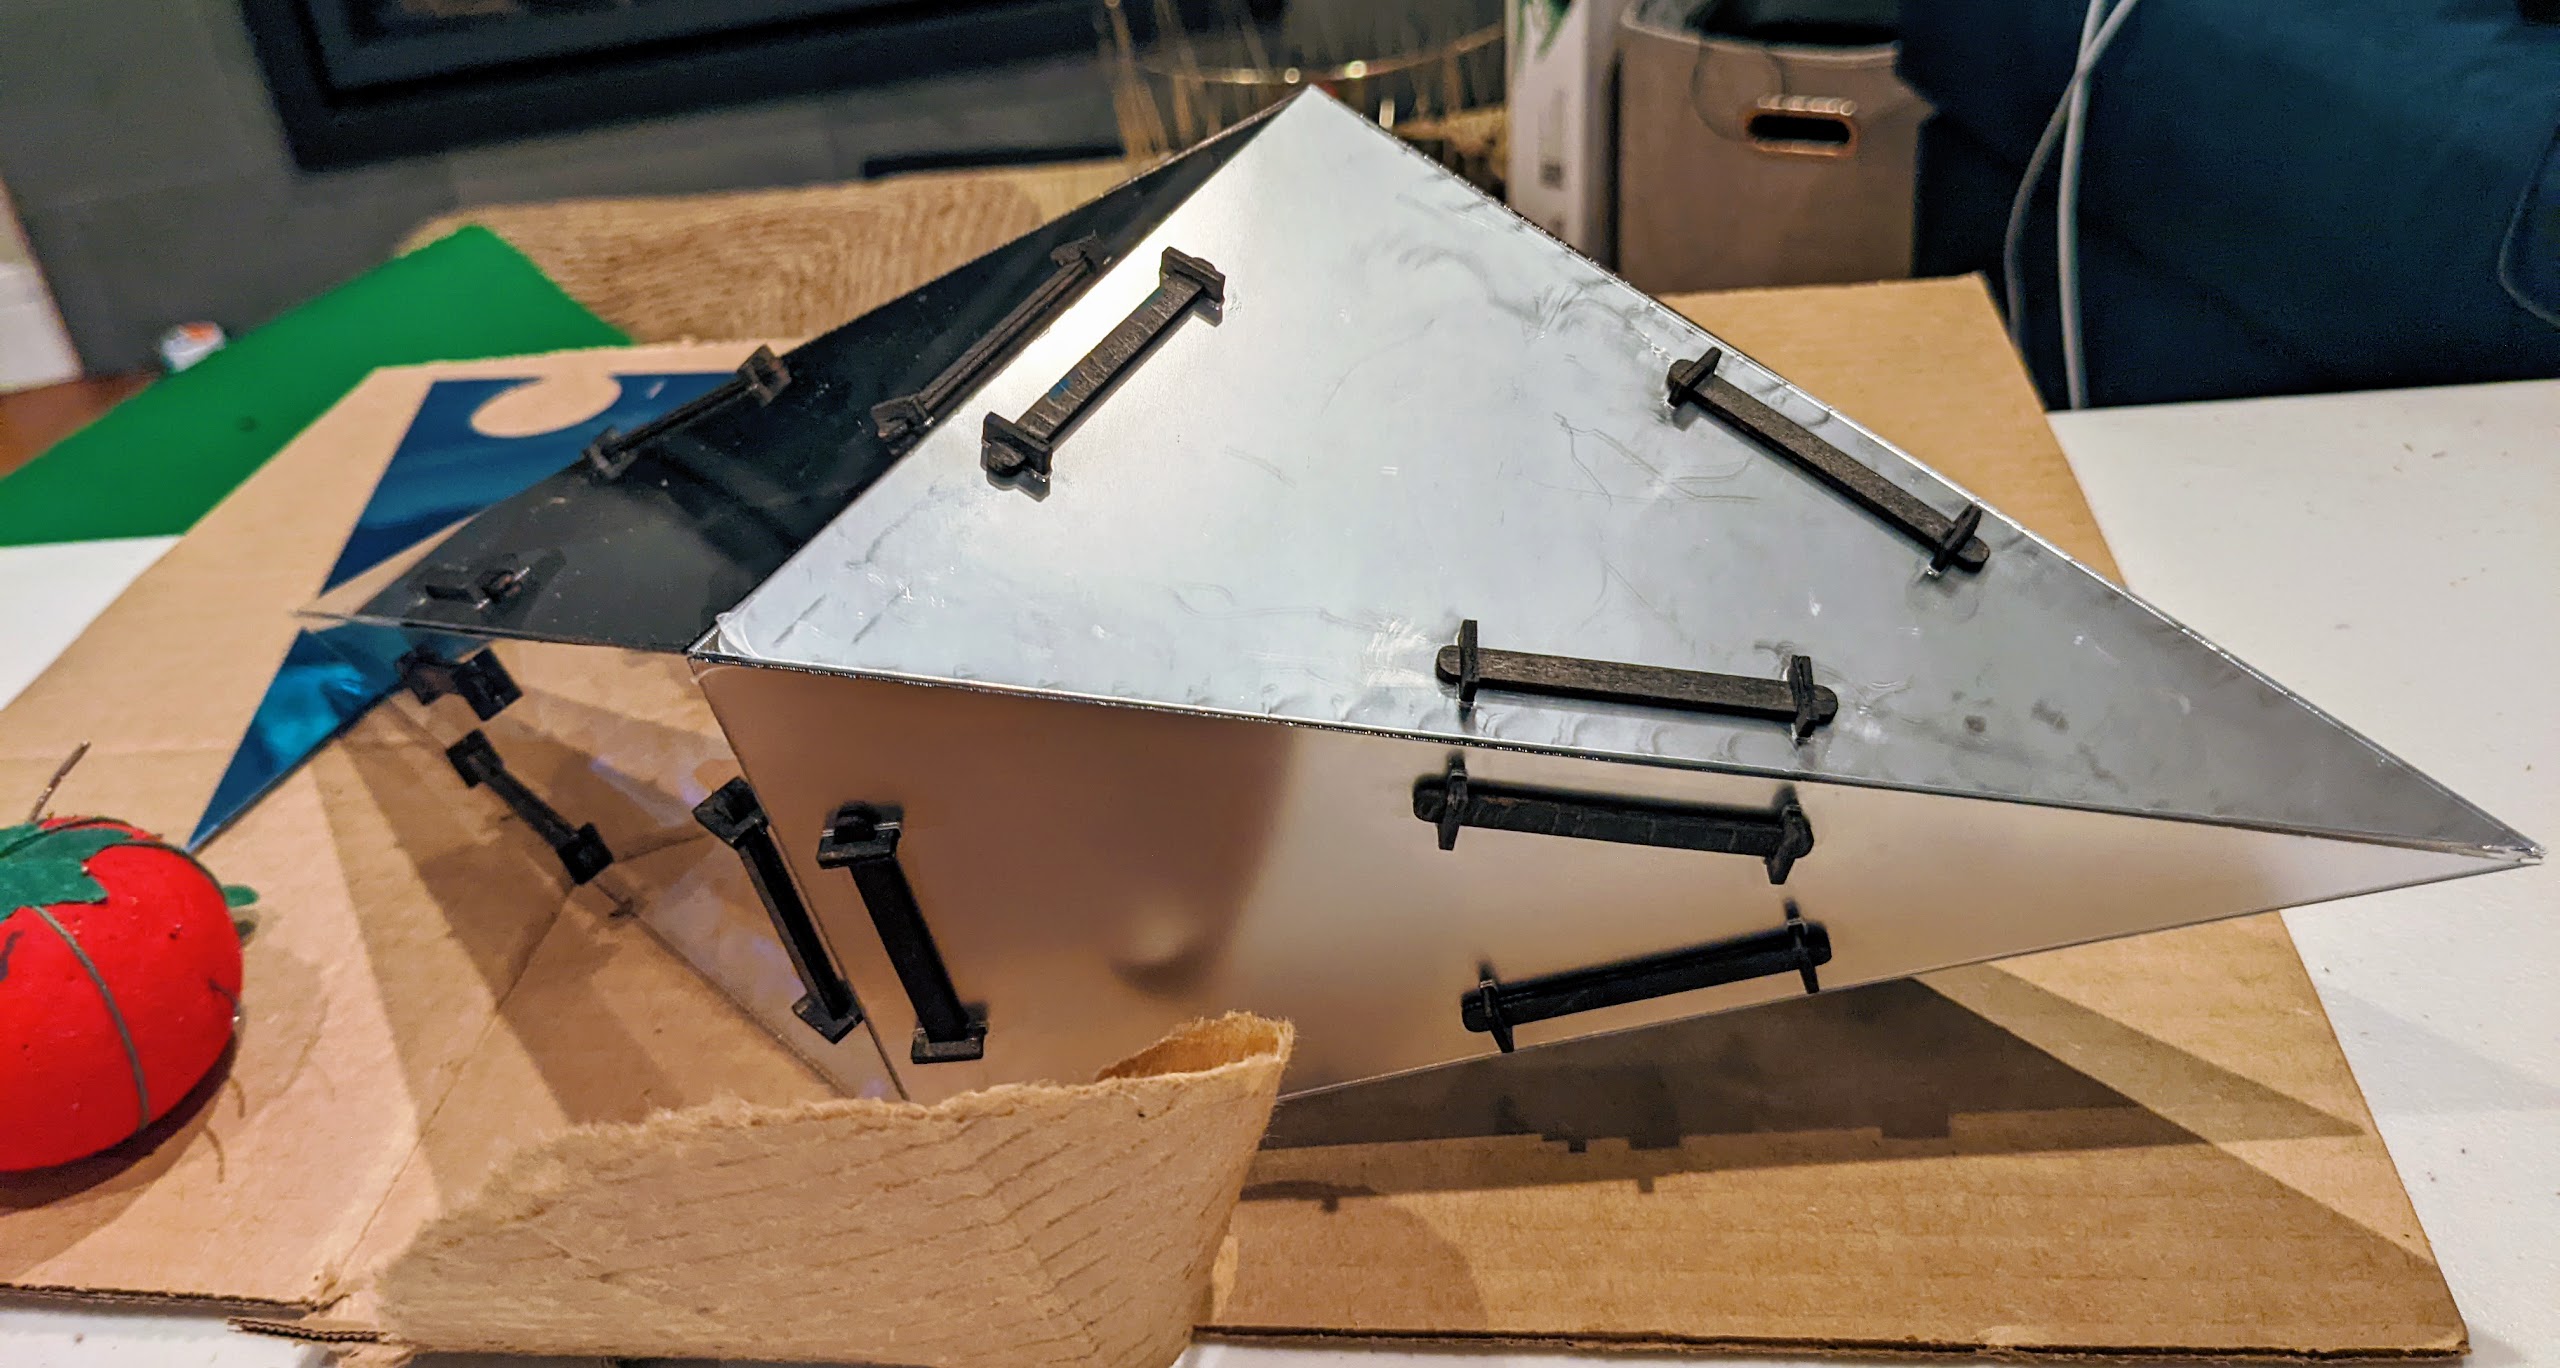
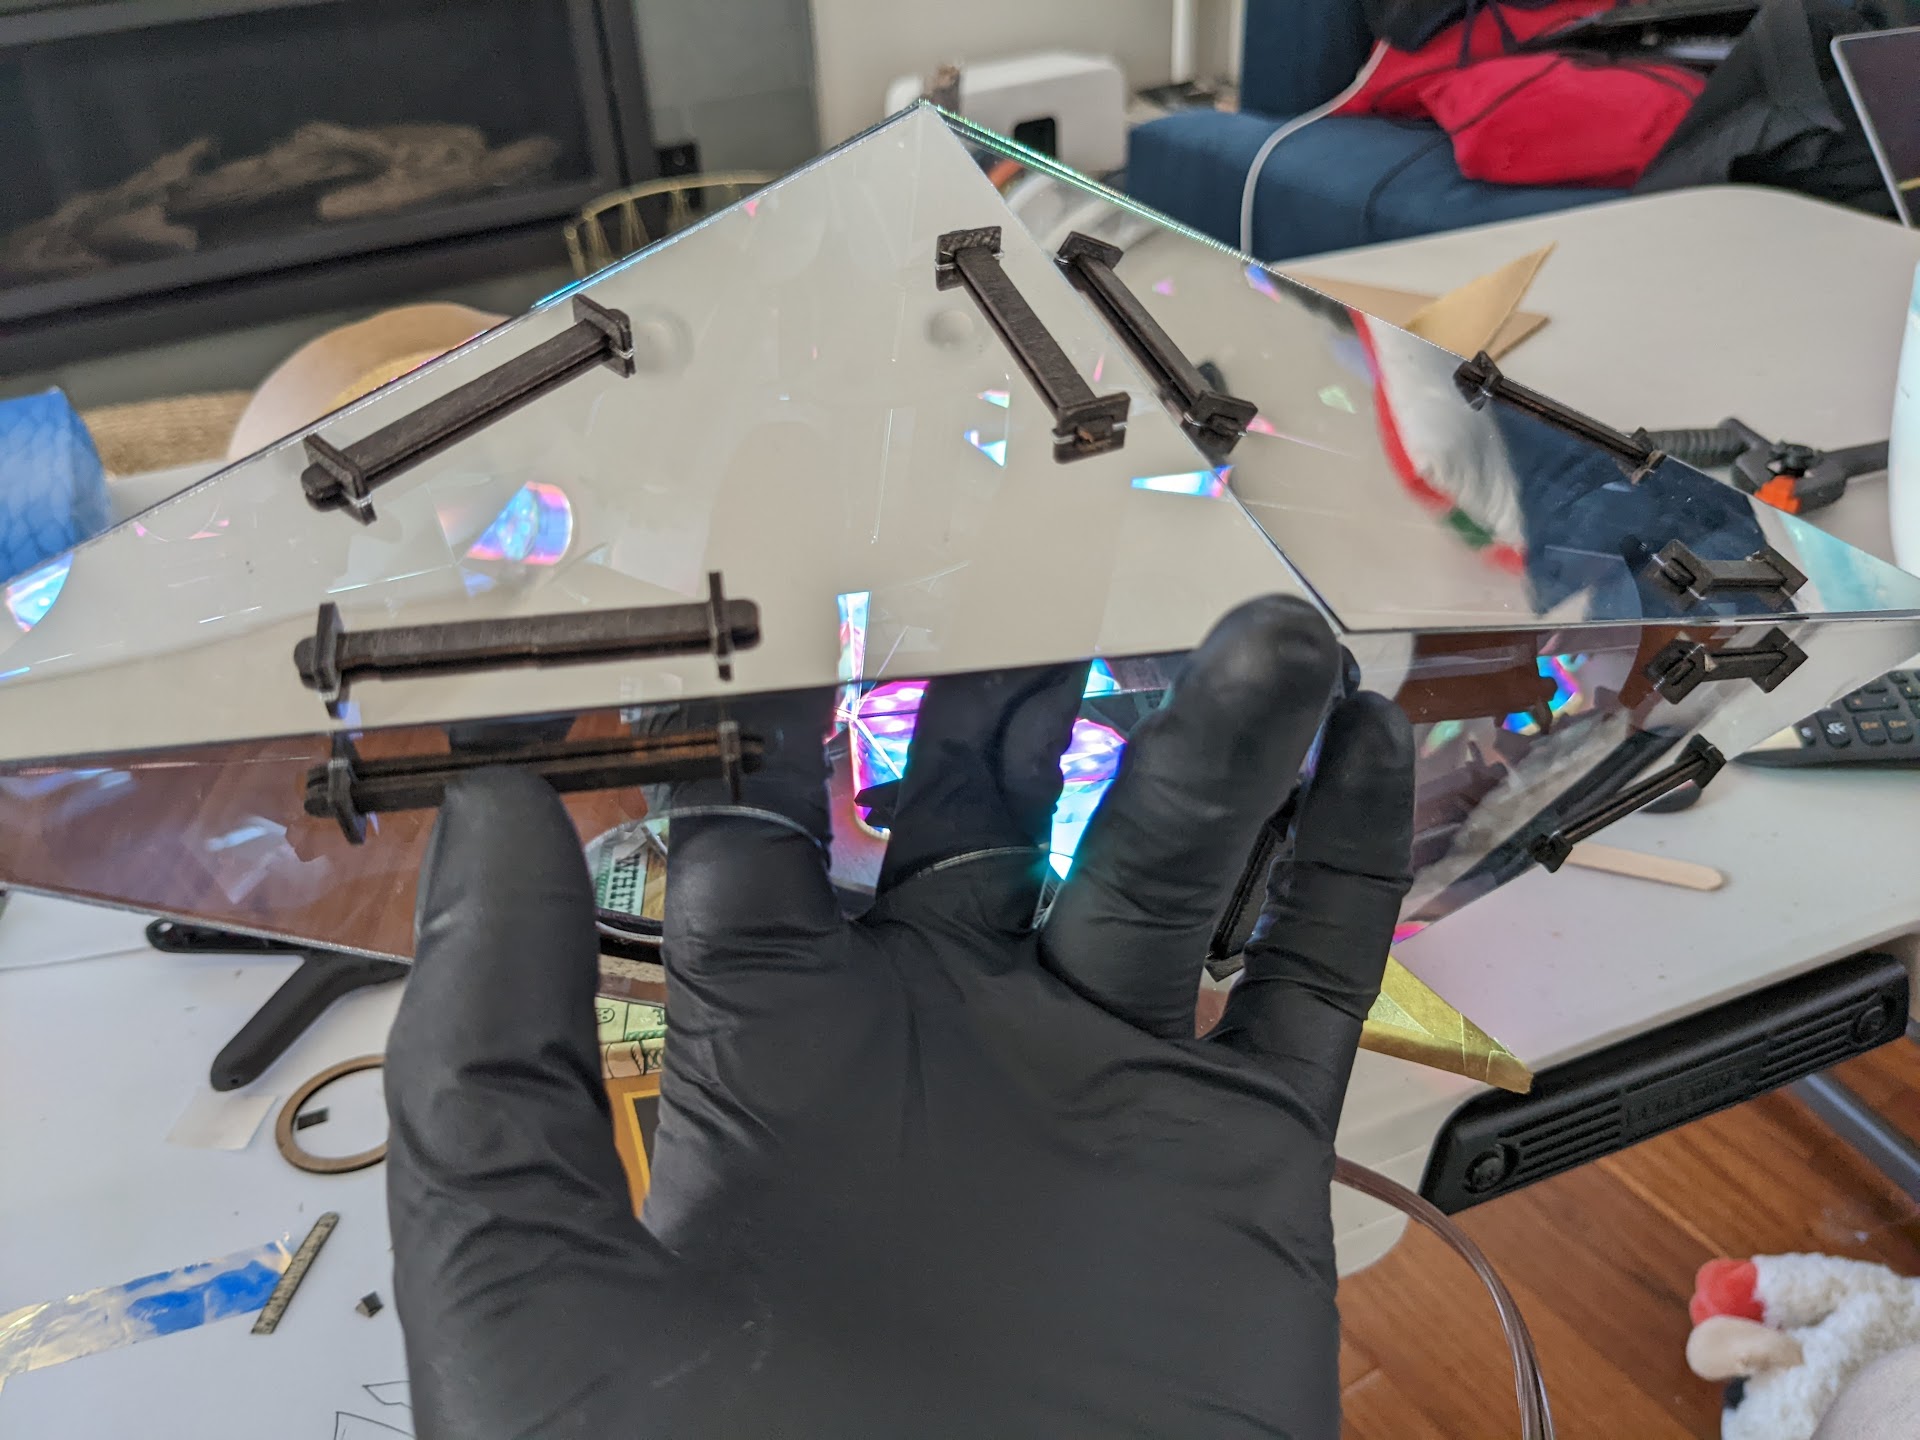
Here’s the object, with all faces and edges present (I did forget to remove some of the protective film on the exterior before taking this photo). The mirrored surface is on the interior, and is thus protected from scratches and fingerprints. This also results in an extremely convincing infinity mirror illusion.
To avoid marring the internal surface with fingerprints I wore nitrile gloves during the final assembly phase:
The bottom face (otherwise known as pleading emoji) was customized to exactly fit two LED bulbs:
It sits on a cardboard tray cut using the same geometry, with voids shaped to hold the protruding parts of the connective piece.
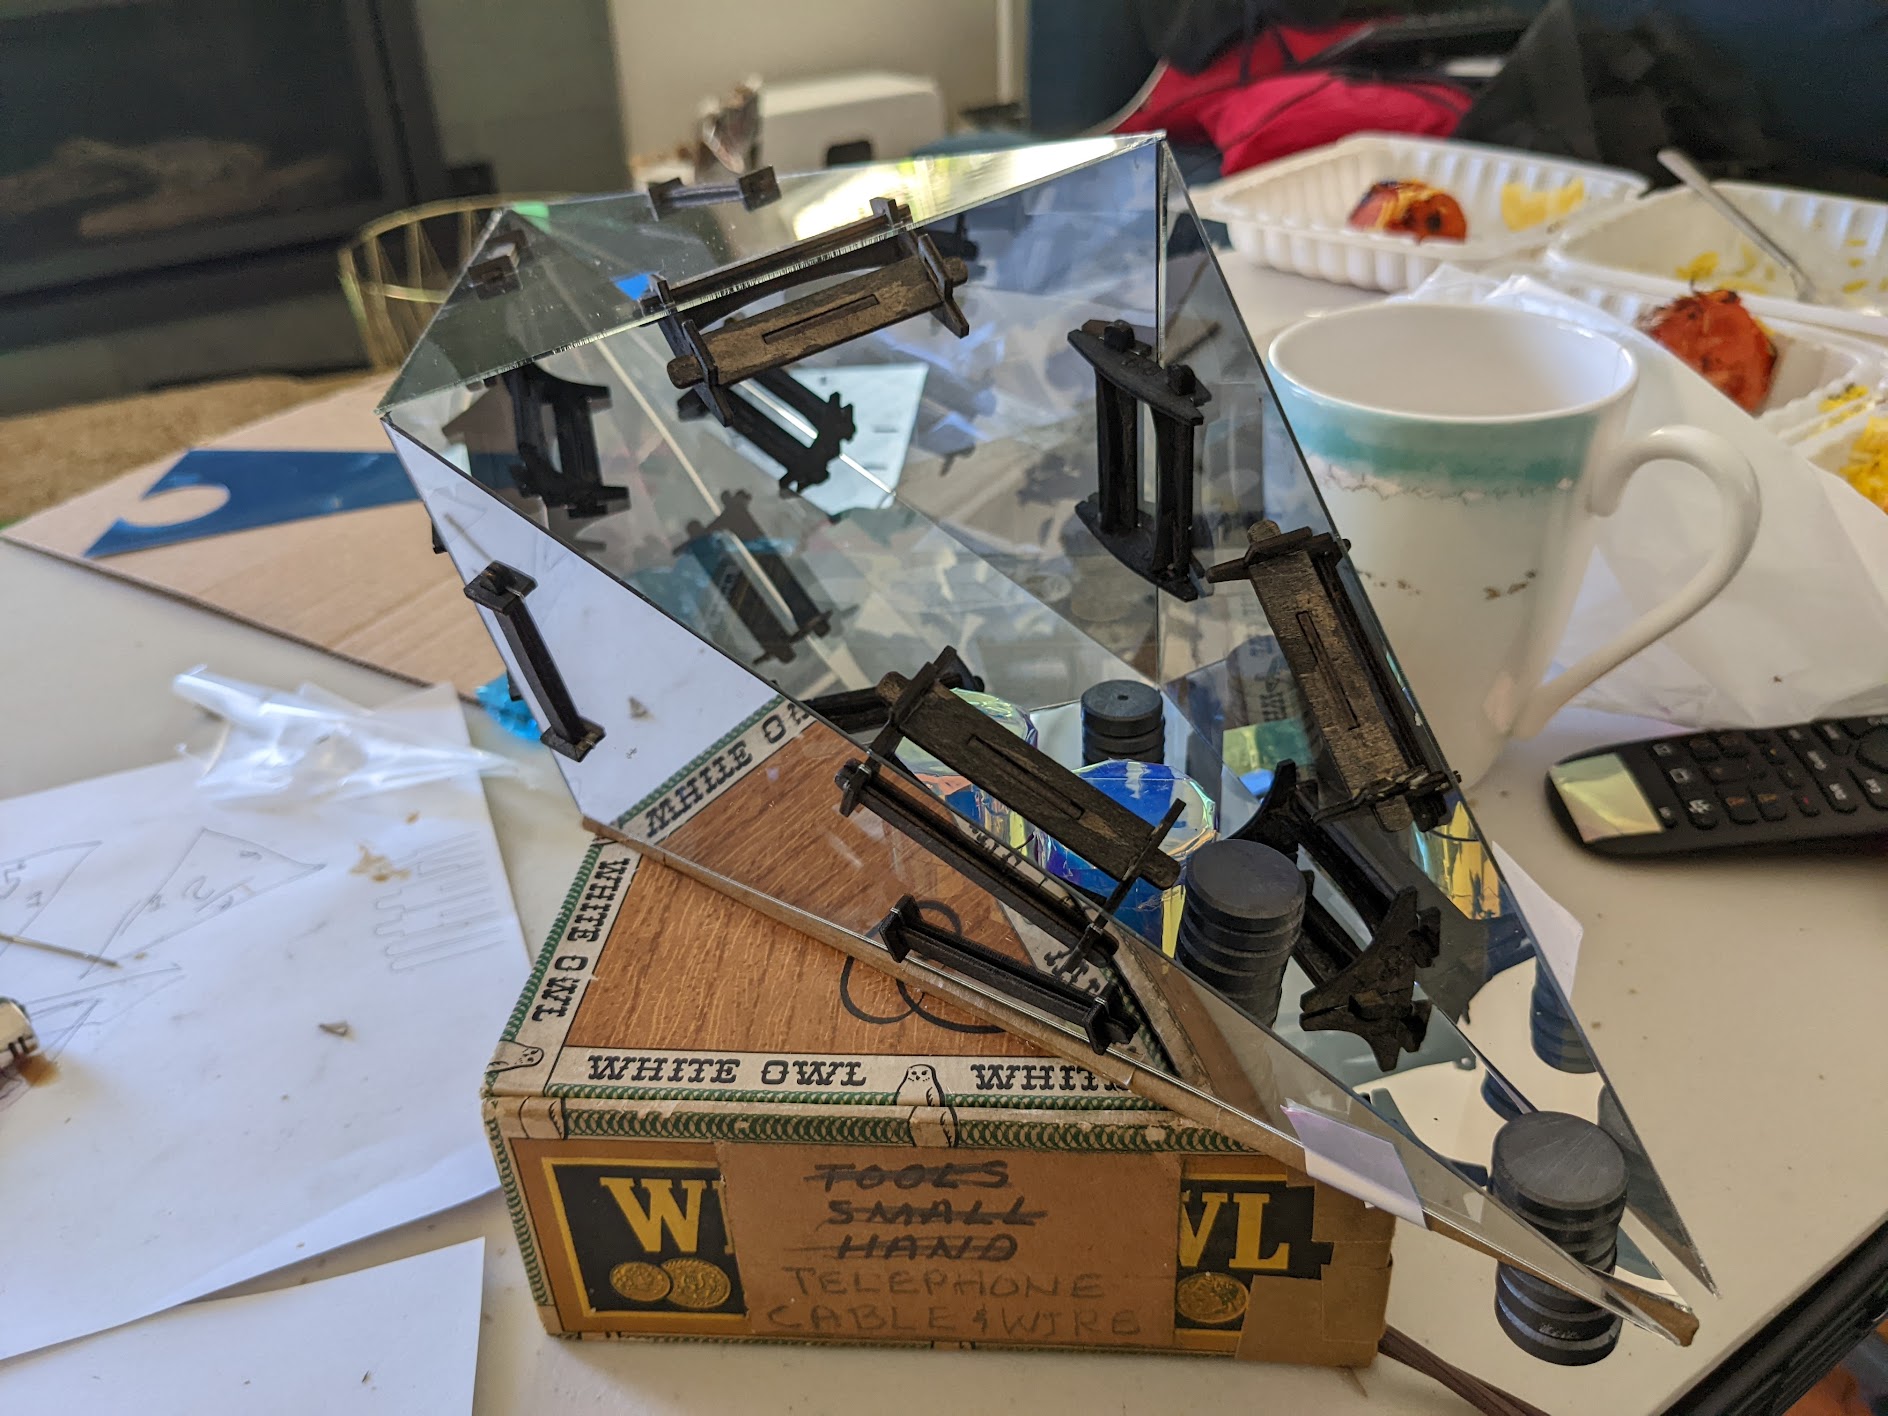
Here’s a picture of the final glue-up:
I’m really happy with how it turned out - here’s a picture showing what it looks like in daylight, from another angle:
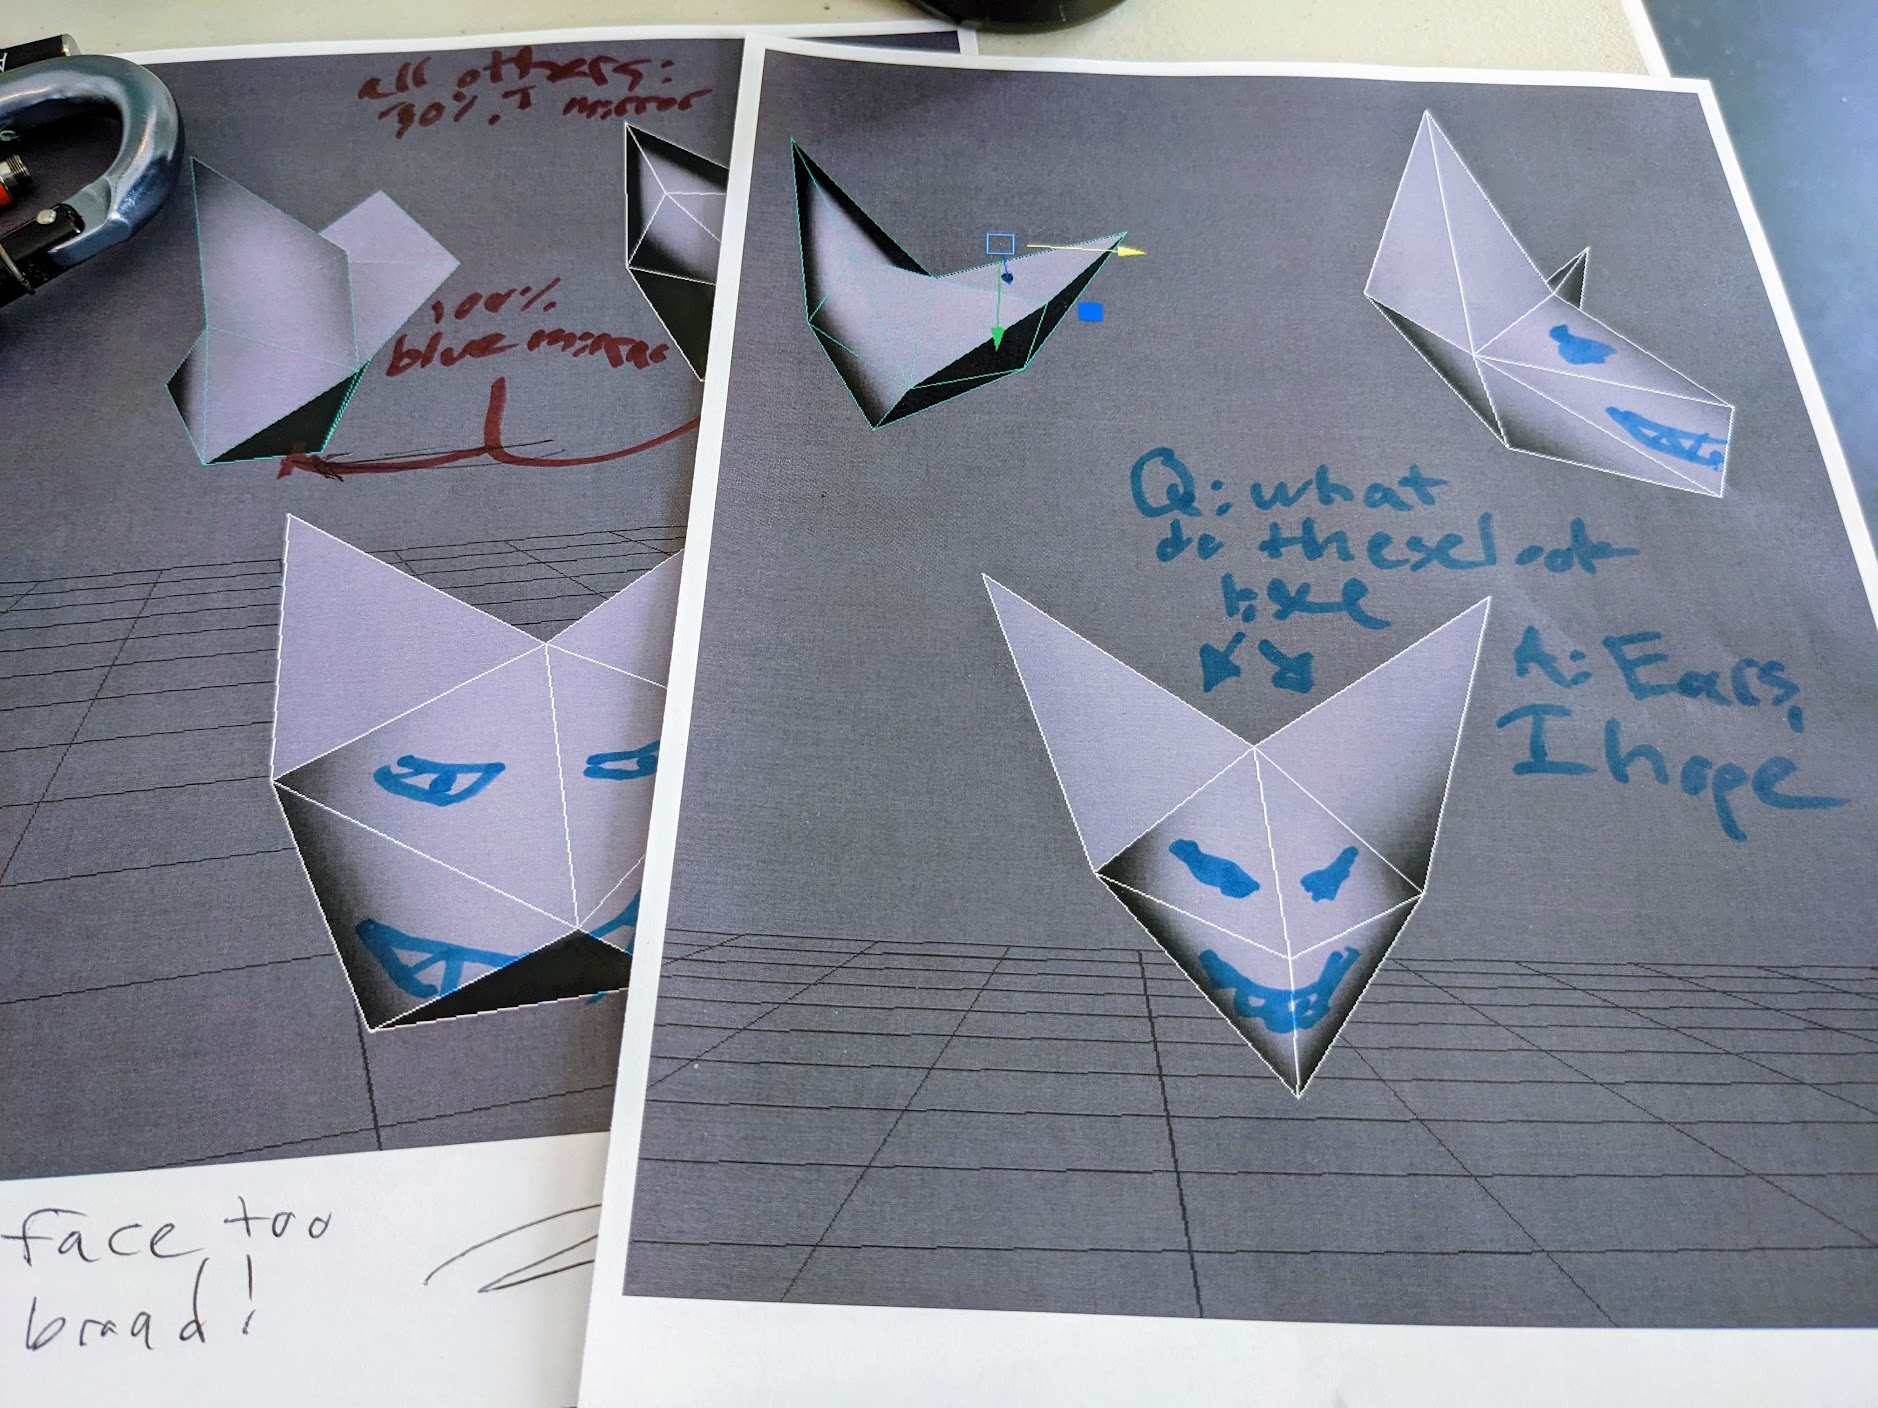
That’s pretty much it. I’ll be making more art like this. Probably less abstract, more representative. Here’s a sneak peek:
Thanks to Fiona Weatherwax, Rain, and Matt Olson for reviewing drafts of this post.